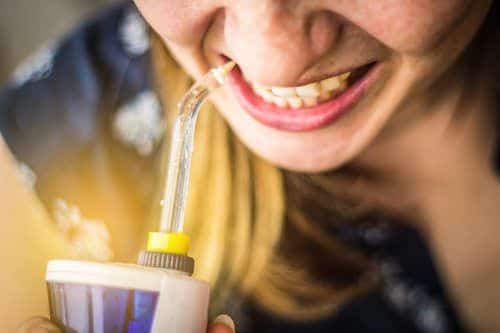
Come on, be honest – have you ever lied to your dentist about how often you floss your teeth? You’re not the only one. NPR reported that 27 percent of adults admitted to this lie in a survey conducted by the American Academy of Periodontology. Moreover, 36 percent said they would rather do an unpleasant activity, like cleaning the toilet, over daily flossing with traditional dental floss. But an increasing body of evidence suggests that improper dental care enhances your risk for several potentially deadly systemic diseases and conditions (source) in addition to periodontal disease. So don’t skip out! There are several products on the market that work with dental floss to remove stubborn food and bacteria. For example, water flossers clean hard-to-reach spots and may motivate you to floss more often. Plus, it’s easy to learn how to use a water flosser. See for yourself . . .

The Importance of Flossing
Brushing your teeth every day is important, but your toothbrush only cleans the tops and outer surfaces of your teeth. You need to floss as well. Avoiding flossing means you’re leaving stubborn tartar and bits of food between your teeth and gums to rot. Not even antimicrobial mouthwash can remove these remains. Plus, the ADA says it only takes a couple of minutes a day to floss. So if you often neglect your flossing duties, reconsider. Dental disease is primarily caused by the build-up of plaque between your teeth, and the use of dental floss and flossing aids can prevent these conditions from developing. One of the most effective flossing aids is the water flosser.
A water flosser is a handheld device that sprays streams of water in steady pulses. The water can help you remove most food from between your teeth. Additionally, some water flossers are ADA approved and can help reduce gingivitis, an early form of gum disease (source).
Many people enjoy the process of water flossing and find that it helps them floss more often than when they use dental floss alone. Therefore, learning how to use a water flosser could enhance your daily oral routine. For optimal results, we suggest using an ADA-approved water flosser in addition to dental floss.
How to Use a Water Flosser
Using a water flosser before or after brushing and flossing your teeth can remove plaque and reduce your risk for periodontal infections and gum inflammation (source). Water flossers are easier for children and adults with low manual dexterity to use. In addition, water flossing is a gentle yet effective way to clean your crowns, bridges, veneers, and dental implants. Finally, people with braces often prefer water flossers for cleaning around brackets and wires.
Although water flossing shouldn’t totally replace dental floss, it can help you floss more often. Plus, it may make it easier to use dental floss by loosening food remains beforehand.
Learning how to use a water flosser can be messy at first; but as you do it each day, you’ll quickly learn the technique. Use the following simple steps to get started:
- Fill the reservoir with lukewarm water. You can easily refill your reservoir by removing the top of the water container. Add a small cup of chlorhexidine mouthwash to the reservoir twice a week to create a sterile environment.
- Select the right tip. Your water flosser should come with a few standard tips, including a classic jet tip, toothbrush tip, plaque seeker tip, orthodontic tip, and pick tip. Choose the one that works best for you.
- Place the tip in the handle. There should be a way to lock the tip in place, either by twisting it or pressing a button on the handle. Consult your product manual if necessary.
- Place the tip in your mouth and start with your back teeth. Hold the tip away from your teeth and gums rather than touching them directly. You may want to lean over the sink so you don’t splash water on your countertop. You can start on either the inside or outside, but be sure to spray every interdental area.
- Turn on your water flosser. There will be either an on-button or a dial that adjusts the water pressure. Start with a low-pressure setting and work your way up. Make sure the pressure is high but comfortable.
- Follow your gum line. Go tooth by tooth to ensure you get all food and tartar residue. Aim for the top of the tooth, the baseline of the gum, and the space between each tooth. Hold the water over each tooth for about two seconds. Repeat this process on the outside and inside of your teeth. It should take you about two minutes to complete.
- Empty the reservoir. Finally, pour out any remaining water. Leaving stale water in your reservoir can cause bacteria to grow.
That’s all there is to it! You’ve just learned how to use a water flosser.
Try Wilkinson Dental
To further improve the health of your teeth and gums, be sure to visit a dentist regularly. At Wilkinson Dental, we are committed to your comfort. We are proud to offer you and your family a relaxing office environment while providing the care you need for a happier, healthier smile. It’s why we offer a variety of services like cleaning and exams, teeth whitening, and more. If you’re ready to set up an appointment, please give us a call at 417-708-0556 or click here. We look forward to hearing from you!